Plan your installation
Taking a moment to plan your installation can make all the difference. Here are some steps to consider
-
• Prior to installation inspect panels for visual defects. Responsibility lies with the installer to ensure panels meet the aesthetic requirements of the project
• It is not possible to guarantee an absolute consistency in colour of plywood between sheets. A slight variation between sheets cannot be considered a defect. Check sheets before commencing your project
• Stand up your panels, plan which sheets will hang side by side to limit and control the variation between sheets
• If lining several areas, sort sheets for the different spaces to limit and control the variation between sheets
• Ensure selected face veneers face up when stacked to ensure panels are fixed the right way
• For best results install panels in as close to the final internal environmental conditions as possible
• Store panels in a dry, cool area.
-
We recommend applying at least one coat of your chosen coating before installation. This will initially raise the grain a little of certain plywood species. It would then require a light sand. When fixing using panel pins, this first coat will also help when filler is applied into the panel pin holes, creating a barrier for the filler to sit on.
When lining ceiling or hard to access areas, the more coats that can be applied before installation, the better. Once installed the final coat can be applied.
-
There are many fixing methods, the most common are:
• Direct Fixing: Pins and Glue
• Concealed Fixing: Adhesives only
• Concealed Fixing: Clip/Plug systems
• Tongue and groove
-
Negative details can create clean, sharp lines and give a great aesthetic. We recommend a negative detail of 5mm or less based on 45mm wide timber battens/steel frames.
When using a negative detail we recommend a small aris on the plywood edges, just enough to take the sharp edge off. This can also be achieved with a soft sand.
Options to darken negative details include black tape, paint or foam for larger negative details.
Fixing Methods:
Let’s have a look at three different methods for fixing. Pins and Glue, Adhesives and Clip/Plug System.
Below you will find helpful guides and specifications for the different options.
Low Profile Fixing using panel pins and adhesives.
For the bonding of Plytech plywood panels to interior walls check these specifications. This step by step specification is designed to give you a clean and low profile finish. You can also use screws, but that won’t be a low profile option.
Wall types covered:
1. Timber Framed/Battened
2. Steel Framed/Battened
3. ‘Previously’ Gypsum Lined
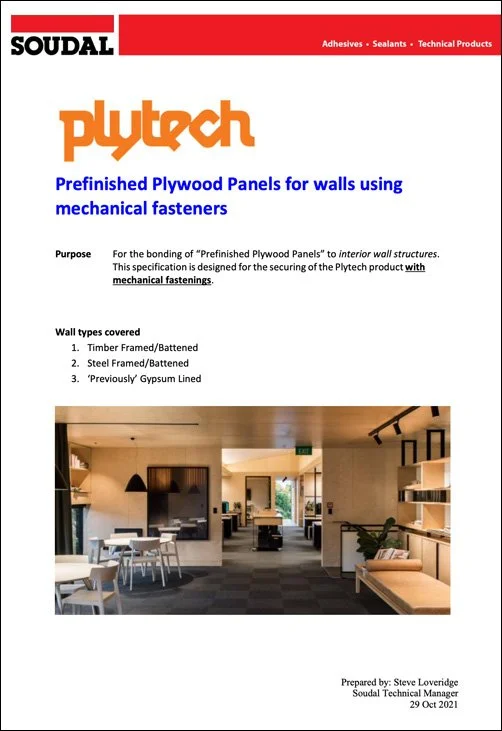


Concealed Fixing using adhesives only
Soudal has developed an installation method for Plytech plywood when used for internal wall and ceiling linings.
When installed according to Soudal technical specifications this system can eliminate the need for mechanical fasteners and/or bracing support during the adhesive curing process.
For technical support regarding this system, contact Soudal on 0800 70 10 80 or visit www.soudal.co.nz.


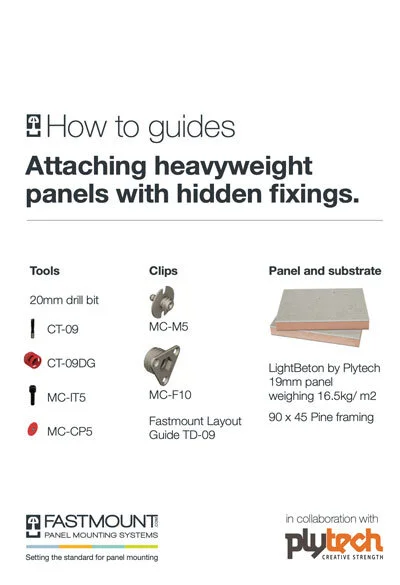
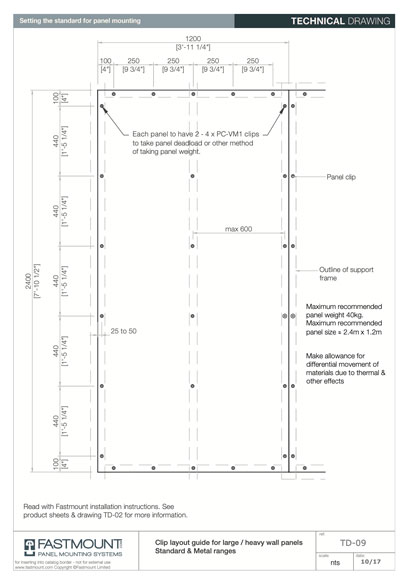
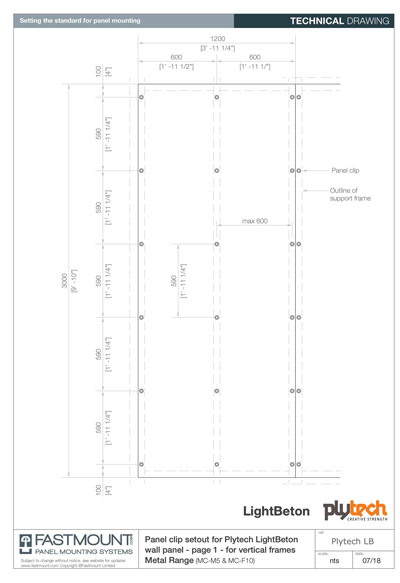
Fastmount Panel Mounting System
Removable panel mounting system for interiors. Designed and manufactured in New Zealand, Fastmount clips are precision moulded using engineering grade plastic.
Find below some ‘how to’ and clip layout guides. (You can find the installation video to guide with each of these ‘how to’ guides below).